Restoring a classic car body is a journey fueled by passion, precision, and a deep respect for automotive history. It is far more than a simple paint job; it is a meticulous process of deconstruction and rebirth. The process begins with a thorough assessment to uncover the true condition of the vehicle, hidden beneath layers of old paint and time. Every panel, piece of trim, and hidden corner is inspected for rust, damage, and imperfections. This initial stage sets the foundation for the entire project, from sourcing rare parts to planning complex metalwork. Bringing a vintage vehicle back to its former glory involves stripping it down to its bare metal skeleton, painstakingly repairing or replacing damaged sections, and methodically rebuilding it layer by layer. It is an art form that transforms a piece of history into a functional, beautiful machine ready for the road again. To learn more about our commitment to quality, visit our about us page.
The journey of classic car body restoration is not for the faint of heart. It demands a significant investment of time, resources, and specialized expertise. Each step, from media blasting the frame to the final color sanding and polishing, requires a unique skill set. The goal is always to honor the vehicle's original character while ensuring structural integrity and a flawless finish. Whether you are considering a full concours-level restoration or a driver-quality refresh, understanding the scope of the work involved is the first critical step.
Bringing a classic car back to life is one of the most rewarding experiences an automotive enthusiast can have. The body restoration phase is arguably the most intensive and transformative part of the process, turning a weathered relic into a stunning showpiece. This phase goes far beyond what is covered in general auto repair, involving specialized techniques to address issues unique to older vehicles. Let's explore the detailed stages involved in a professional classic car body restoration.
Before any repairs can begin, the vehicle must be completely disassembled. This is a crucial step that allows for a full and accurate assessment of the body's condition. Every component—doors, fenders, hood, trunk, bumpers, trim, glass, and interior—is carefully removed, labeled, and cataloged. This methodical approach ensures that no part is lost and that reassembly is as smooth as possible. Photographs are taken at every stage to document the original configuration. Once stripped, the bare shell reveals all its secrets. Technicians can now perform a detailed inspection, similar to a pre-repair damage inspection, to identify all areas of rust, previous poor repairs, dents, and structural weaknesses that need attention.
With the car disassembled, the next step is to remove decades of old paint, primer, and body filler to get down to the bare metal. This is most effectively done through media blasting. Different blasting media are used depending on the panel's material and condition:
After blasting, the bare metal is immediately treated with an epoxy or etching primer. This protective layer prevents flash rust from forming, which can happen in a matter of hours, and prepares the surface for subsequent bodywork.
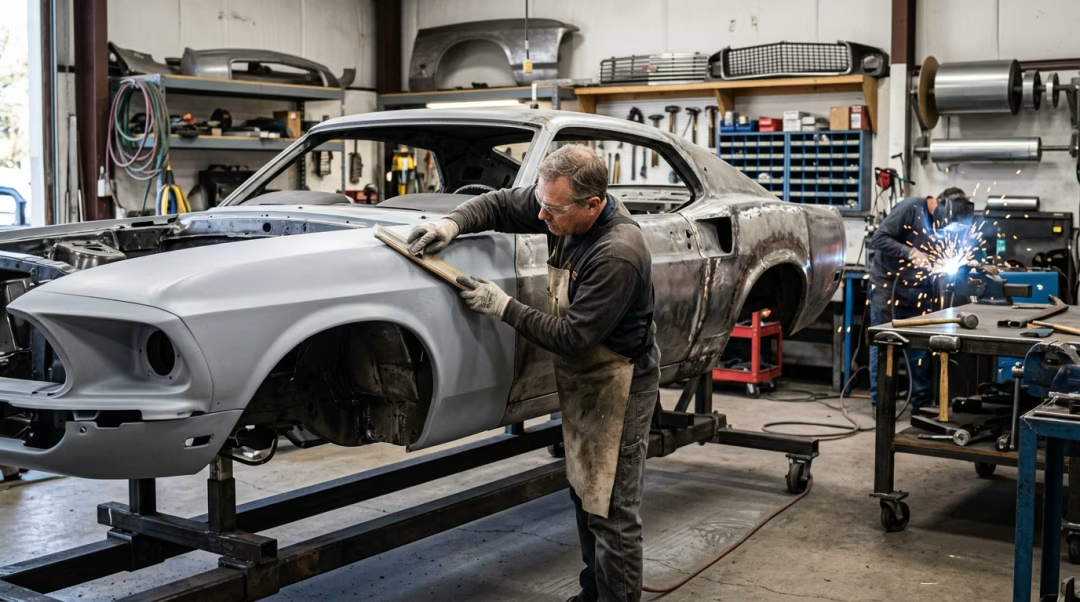
This is where the true craftsmanship of body restoration shines. Any areas with rust corrosion must be completely cut out. Simply grinding it down or covering it with filler is a temporary fix that will fail. Rust is like a cancer; if not fully removed, it will return and spread, eventually bubbling through the new paint. Technicians will precisely cut away the affected metal until only clean, solid steel remains. For a better understanding of this destructive process, you can read about what causes body panels to rust after minor damage.
New metal patches are then fabricated and welded into place. Depending on the car and the extent of the damage, this can involve using pre-made replacement panels or hand-fabricating custom pieces from sheet metal. Welding techniques like MIG and TIG are used to create strong, seamless bonds. Any dents, dings, or creases are also addressed during this stage using hammers, dollies, and other specialized tools to reshape the metal back to its original form. The goal is to make the metal as perfect as possible before any filler is applied.
While the goal is to use as little body filler as possible, it is an essential tool for perfecting the surface. A thin skim coat of high-quality filler is applied over welded seams and minor imperfections to create a perfectly smooth, uniform surface. This is not about sculpting entire panels from filler but about achieving flawless contours. The filler is then meticulously shaped using a process called block sanding. Using long sanding blocks, technicians sand the filler and surrounding metal until the panel is perfectly straight and the transitions are undetectable by sight or touch. This is a time-consuming, artistic process that requires an expert eye for detail to avoid waves or low spots in the final finish. Proper shaping at this stage is critical to avoiding issues like poor panel gaps during reassembly.
Once the metalwork and initial shaping are complete, the car enters the paint preparation phase. Several coats of high-build primer are applied. This type of primer fills in microscopic scratches and imperfections left from the sanding process. The entire body is then block-sanded again, often multiple times, using progressively finer grits of sandpaper. A "guide coat," a thin layer of a contrasting color, is often used to reveal any remaining low spots or high spots that need further attention. Once the body is perfectly smooth and straight, a sealer is applied. The sealer creates a non-porous barrier between the primer and the topcoat, ensuring a uniform color application and preventing the paint from soaking into the primer, which could cause a dull finish.
The vehicle is now moved into a downdraft paint booth, a controlled environment that prevents dust and debris from contaminating the finish. The color coats are applied in several thin, even layers. Understanding how auto body shops match factory paint codes is especially important for classic cars to achieve an authentic look. After the base color is applied, multiple layers of clear coat are sprayed on top. The clear coat provides the deep gloss and, more importantly, protects the color from UV rays, scratches, and environmental contaminants. Exploring the difference between base coat and single stage paint can help you appreciate the modern approach that provides superior durability.
The work is not over once the paint is dry. The new clear coat will have a slight texture known as "orange peel." To achieve a mirror-like finish, the entire body is wet-sanded with extremely fine-grit sandpaper (1500 to 3000 grit) to level the clear coat. This is followed by a multi-stage polishing process using different compounds and buffing pads to bring out a deep, brilliant shine. Finally, the car is painstakingly reassembled. All the trim, chrome, glass, lights, and badges that were removed in Phase 1 are carefully reinstalled, with new seals and hardware used throughout. This final step brings the entire project together, completing the transformation from a forgotten classic to a road-worthy work of art. Understanding how to care for a fresh paint job is crucial to maintaining the beautiful finish for years to come.
The cost varies dramatically based on the car's initial condition, rarity, and the desired level of finish. A project can range from twenty thousand dollars for a straightforward job on a common model to well over six figures for a complex, concours-quality restoration on a rare vehicle requiring extensive metal fabrication.
Timeframes are highly dependent on the project's complexity and the shop's schedule. A simple restoration might take several months, while an extensive, ground-up project can easily take a year or more. The metalwork and paint preparation stages are typically the most time-consuming parts of the process.
Virtually any amount of rust can be repaired, but it becomes a question of cost-effectiveness. If a car's frame or unibody structure is severely compromised, the cost of repair may exceed the vehicle's value. However, for most body panel rust, skilled technicians can cut out the affected areas and weld in new metal for a permanent repair.
A restoration aims to return a vehicle to its original, factory-stock condition using original or reproduction parts. A restomod (restoration + modification) combines the classic look of the original car with modern technology, such as an upgraded engine, suspension, brakes, and modern interior amenities for improved performance and comfort.
This often depends on the quality of available replacement parts. For many classic cars, original factory panels (often called OEM parts) have a superior fit and finish compared to aftermarket reproductions. If an original panel can be skillfully repaired, it is often the preferred choice to maintain the car's authenticity and ensure proper alignment.